Archives

MyHeritage’s Theory of Family Relativity

It seems as if every DNA and genealogy company is unveiling wonderful new features this week at RootsTech 2019 which makes me wish I was there. It will take me many posts to cover all the ones that excite me!

MyHeritage has just unveiled a cool new feature called the “Theory of Family Relativity.” The idea is to look at your tree and other trees in their database to see if the computer can figure out how you are likely to be related. When you click on the big pink View theories button at the top of your DNA matches page it will show you just the DNA matches for whom it thinks it has found the relationship.

What is exciting and different about this offering is that when you click on the “View theory” in the listing for a match it offers you several paths to view a graphical representation of the possible relationship including percentages of accuracy. It also indicates the trees or records the deduction was made from. Here is how it shows that with a known 5th cousin of mine. I had not known that she had tested nor had I been in touch, although I knew her family.


If you go to the match page of a match that has a theory, it will show you a compact view of the expected relationship at the top of the page without the tree names and percentages however it includes a click point to see the full theory.

Continue reading

Basics: GEDmatch reinvented part 1

UPDATE 18-AUG-2019: Since the GEDmatch site and GENESIS are one and the same now I have updated this post to say GEDmatch rather than GENESIS

GEDmatch.com is a free 3rd party site of tools where you can upload your DNA test results and compare them with those from people who have tested at other companies. It is the new version of GEDmatch.com that can compare the data from many more companies than the original. Click here for my previous post written for GEDmatch users moving to GENESIS. Today’s article is to introduce the new version of the GEDMATCH basics to the new tester.

GENESIS Home page for my cousin who has only 2 kits migrated and is not a Tier 1 member

One problem for many users is that this site is not intuitive. GEDMATCH does not hold your hand and does not build your tree for you. You have to learn how to use the tools there to the best advantage for your own research. I have many posts on this blog for GEDmatch, . UPDATE 17 FEB 2019: Click here for the slides from my presentation about the basics of using this site from Saturday Feb 16, 2019, in Carlsbad for the North County DNA Interest Group (DIG).

To get started at GEDMATCH, you have to be registered as a user.  Your login will be your email address with a password you create. Some people prefer to use an email which they have created just for genealogical research. Easy to do at gmail, hotmail, or yahoo, among others and it is a way to create some privacy. Note that GEDmatch is careful to warn you when you register that their site can be used by law enforcement to try to identify violent offenders and victims. Click here to understand how your DNA can out a distant cousin who is a criminal.

Before you can use GEDMATCH to explore your test results, you have to download your DNA data from your testing company. Click here for the help page that GEDmatch provides on how to download your DNA. The file of your test results is quite large (about 700,000 lines of data) and zipped. DO NOT UNZIP it.

To upload your results to GEDMATCH you log in and then click on Generic Uploads (23andme, FTDNA, AncestryDNA, most others) in the right hand column under Upload your DNA files. That takes you to a form to fill out before doing the upload. You have to enter the name your kit was registered under, but you can choose to use a pseudonym to appear on GEDMATCH. Put it in the box for alias on this form. For example, all my cousins are called Kittys#CuzNN where the number sign is 1st, 2nd, or 3rd, and NN is their initials so that I know who they are! You have to change the No to a Yes after “You authorize this data to be made available for comparisons in the GEDmatch public database” if you want your results to be visible to your matches.  If you want to stay private, then leave it as is for now, but change it after it is uploaded to “Research” so you can use all the tools on the site but stay invisible. Once your or your cousin’s file is uploaded, you are assigned a kit id (2 letters plus several digits) which will also always show on your home page when you log in. You need a kit id to use the tools. You can upload multiple tests and manage them all from this one user.

You can make edits to any kit you own by clicking the pencil icon next to it on the left side of your home page. Click here for my presentation slide that shows you that edit screen and where to change the privacy to public or research or private.

It usually takes a day or two to fully process your kit so that you can run the most important tool: the one-to-many. That is the tool that lists your DNA relatives in the GEDmatch database. While you wait you can experiment with the ethnicity tools (called admix here) covered in my Gedmatch basics post and in detail in these slides (click here).

If some cousin, like me, asked you to upload and gave you their kit number, you can do a one to one compare with that kit before your kit is fully ready for the other tools. Click here for the slide that shows the form to make that comparison. There are slides following that one which have some examples. You can use all the defaults when you fill out the form with one exception: you may prefer to check the prevent hard breaks box at the bottom. That is particularly recommended for an X one to one. Personally I prefer to look at the image only comparison first, then I click back and select position only to get the numbers for each segment to put in my master spreadsheet.

Once you see a blue check mark on the line with your kit number on your home page (as in image above), you can run the one to many tool. That looks at all the other kits in the database to find people whose DNA matches yours. The more cMs you share, the closer the match.

Continue reading

Are you genetically resistant to AIDS?

There is a gene called CCR5 that can have a variation that prevents AIDS. You need to have two copies, one from each parent, to be immune to AIDS. If you have only one copy, your resistance is increased. The current theory is that this mutation became prevalent in Europeans after the ravages of smallpox or perhaps the Black Death and was selected for, since it is presumed protective against those diseases. It is more frequent in Northern Europe than Southern, but is found as far south as North Africa.

from wikipedia – By US National Institutes of Health – National Institute of Allergy and Infectious Diseases – US National Institutes of Health – National Institute of Allergy and Infectious Diseases, Public Domain, Link

The down side is that this CCR5 change may increase your risk of an abdominal aortic aneurysm and put you at risk for complications from various viruses like West Nile or tick born encephaliitis. Wikipedia has an excellent and detailed article about CCR5 here.

This AIDs protective variation is actually the loss of 32 alleles (so it is called delta 32) on chromosome 3 at location 46414947.

It is that change that the Genetics researcher He Jiankui claims to have made on two embryos in China using CRISPR technology which has caused such an uproar around the world. Click here for the NPR article about that which mentions that their father is HIV positive.

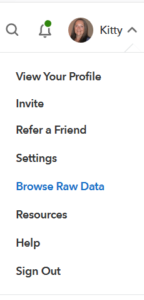
If you have tested your DNA at 23andme, you can check your own CCR5 for the delta 32 variation which is known as i3003626 there. Here’s how

Continue reading

Finding Cousins at 23andme

There are a number of posts on this blog which can help you navigate 23andme (click here) but as always in life, things change. Now there are many new features and ways of finding information that are not covered by those articles. Plus the tests sold during the holiday sales are coming in and I have lots of new cousins.

The Family & Friends page – red arrows show what to click to get to the DNA relatives list from either top menu or this page

The key to using your 23andme test for finding new cousins is to navigate to the DNA relatives page and then click on each name of interest to go to the page with information about that match. The contents of that page are well covered in my previous blog post (click here)

Most importantly, you can get to the version of the chromosome browser that shows the actual segment locations and sizes from that match page. Here is why that is important.

When a new tester matched me, my dad, and several distant cousins for 33cM on a specific location on the X, I knew she was related via the Fatland farm family from Halsnøy island, Hordaland, Norway, because I had previously identified the ancestral source of that segment from the 1700s (click here to read about that). It took me a little over an an hour using Ancestry’s possible parent clues to build her a tree and find her descent from that family. It helped that I knew what I was looking for and only one of her Norwegian lines was from the Hordaland region.

23andme does not do tree matching for you like Ancestry does, but it does provide a chromosome browser. This means that sometimes you can tell from the segment that a cousin matches you on who the likely common ancestor is. When you keep a large master spreadsheet of all your matches from all the companies, this can sometimes be quick and easy (click here to read about using spreadsheets for DNA ).

Continue reading

More Automated DNA Match Clustering!

Have you been wondering why are all your favorite bloggers are going crazy for automatic clustering? Well it is a fun visual technique to see which matches belong to which family line by making a chart with your matches across both the top and side, grouping them by who matches who, and then coloring those boxes in. This creates visual clusters which will roughly correspond to your great grandparents or their parents.

My perfect cousin has many matches on all her great grandparent lines (green is my Munson side) so I used her to showcase the new DNAgedcom clustering above. Notice how similar it is to her cluster from Genetic Affairs shown in my previous blog about that site and tool.

Here are all the new ways to cluster our DNA matches:

  • DNAgedcom now has a clustering tool in their client (DGC) which uses your ancestry match list and ICW files (described in detail in the read more below)
  • Genetic Affairs has Ancestry clustering working again
  • DNApainter created a tool to create a CSV from the Genetic Affairs html cluster file. Some of us love to use spreadsheets.
  • Andy Lee of Family History Fanatics figured out how to take an autosomal match matrix from GEDmatch and cluster it in a spreadsheet program, Click here for that video – the explanation starts just after 42 minutes and this is really fun!
  • Rumor has it that GEDmatch may add automatic clustering sometime in the new year…

All of this is based on the method developed by Dana Leeds to organize your matches which is easy and simple to do. Click here for her blog about that.

Read on for how I used the new DNAgedcom clustering tool for myself and my brother, where I know all our great grandparents.

Continue reading