Archives

The Beta One-To-Many Tool: GENESIS Basics II

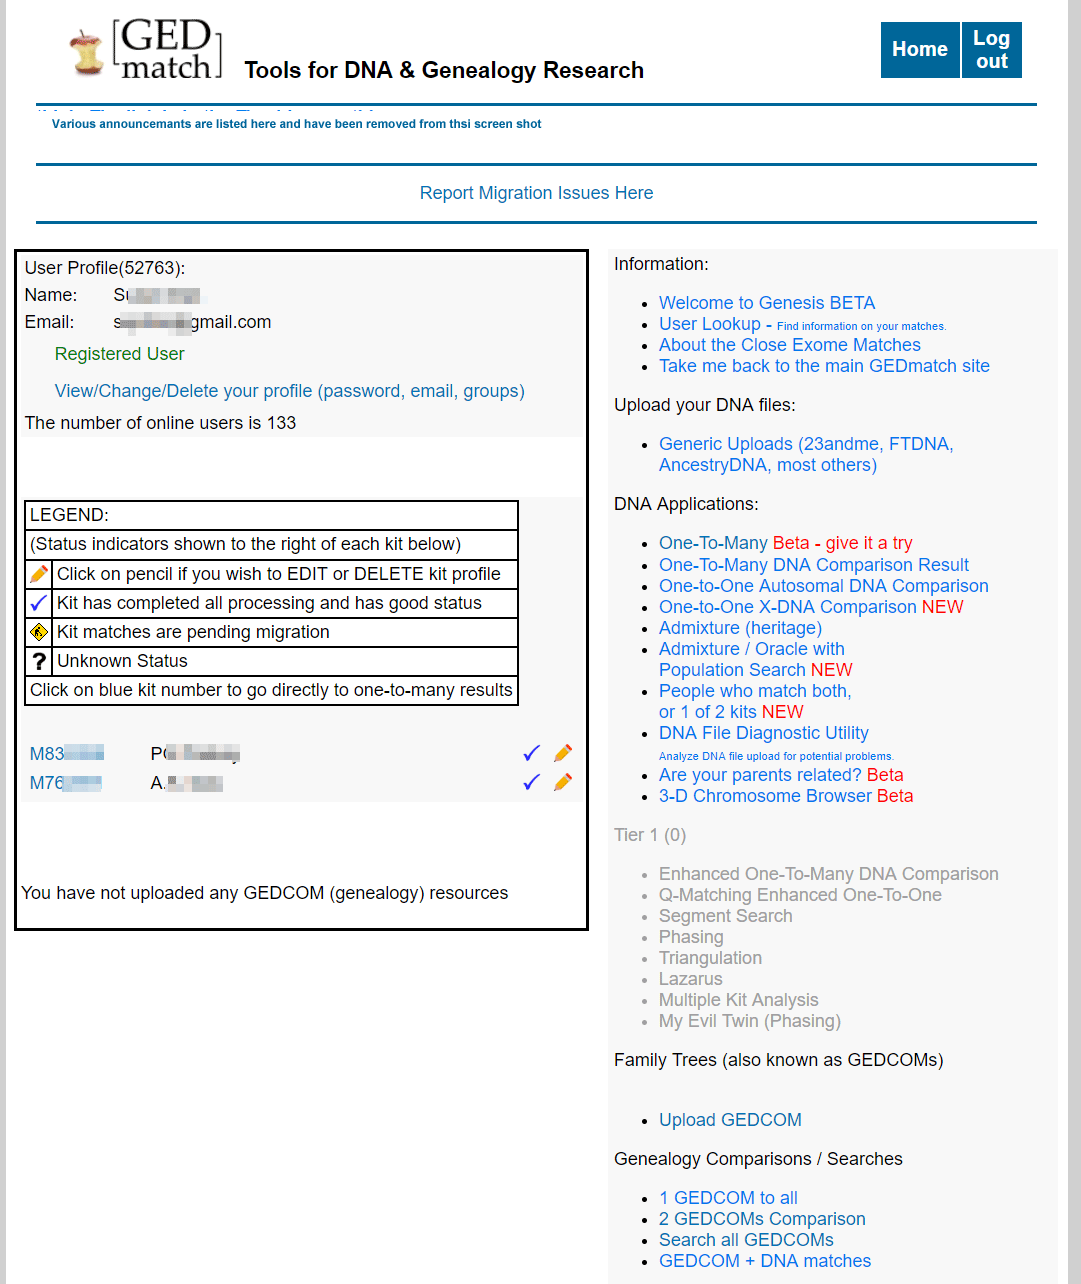
Finding cousins who can help solve genealogical mysteries are what many of us are hoping for when we do DNA testing. The various One-to-Many tools at GEDmatch Genesis list all the people who match the DNA kit you specify. These are cousins or even closer relatives.

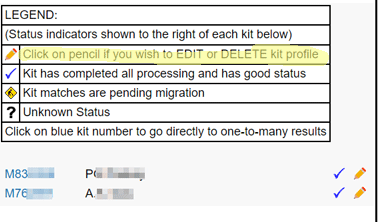
The new beta version of the One-to-Many tool  is found under the heading DNA Applications in the right hand column of your home page.

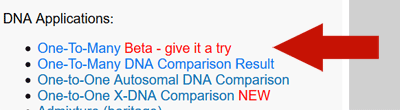
My red arrow points to it in the image to the left.  It is a much improved tool, more like what was available on GEDmatch. When you click on it, you get a form as shown below which only needs the kit number added.


If you have set up some tag groups (click here for my GEDmatch tag group article), check the tag group box named “All” (shown with my red arrow above). Below is what my One-To-Many result looks like with my tag groups. The kit number is shown with the color of the group it belongs to. Note that when I have a person in more than one tag group, I get duplicate lines for them, one for each color coded tag group they are a member of:

My top matches in the One-To-Many with my tag groups (click for larger image)

One of the great features of this tool is that every column is searchable by putting text in the box above the column and then clicking the enter key. [UPDATE: this is a Tier 1 feature only and is more directly called a filter]. Another one is sortability via the up and down arrows at the top of the column. When working with my Jewish side, I sort by largest segment to get my closest cousins at the top. The reason I do that is that endogamous populations will often share many small segments from way back so the total cM make a triple 5th cousin look like a 2nd or 3rd ; however close cousins will always share larger segments.

This beta One-To-Many tool includes many of the features GEDmatch users are used to: the link to a tree*, the display of haplogroups, the estimation of generations difference, and the X matching. It also includes the new overlap number which lets you know how many SNPs are tested in common between the two kits. The overlap issue was discussed in my previous article about GENESIS

You can click on any kit number to get a One-To-Many for that kit or click on the underlined largest segment number to compare the cMs of the two kits for either autosomal or X. In both cases you are taken to a prefilled in form on which you can make changes to (don’t yet) before you click the Submit or Search button. On the X comparison, I recommend you click the “Prevent Hard Breaks ” because there is a large gap in the middle for many tests otherwise.

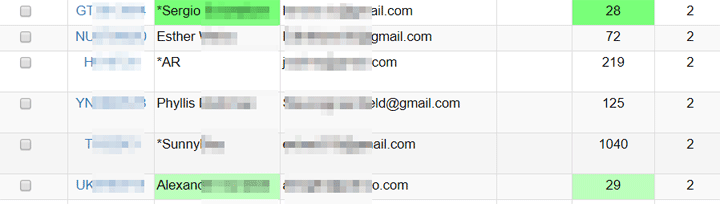
New matches will be indicated by having their names and days since upload colored in green. The green gets lighter the longer they are there until it eventually goes away.

Here is a table with an explanation for all of the One-To-Many column headings:

Continue reading

Basics: GEDmatch reinvented part 1

UPDATE 18-AUG-2019: Since the GEDmatch site and GENESIS are one and the same now I have updated this post to say GEDmatch rather than GENESIS

GEDmatch.com is a free 3rd party site of tools where you can upload your DNA test results and compare them with those from people who have tested at other companies. It is the new version of GEDmatch.com that can compare the data from many more companies than the original. Click here for my previous post written for GEDmatch users moving to GENESIS. Today’s article is to introduce the new version of the GEDMATCH basics to the new tester.

GENESIS Home page for my cousin who has only 2 kits migrated and is not a Tier 1 member

One problem for many users is that this site is not intuitive. GEDMATCH does not hold your hand and does not build your tree for you. You have to learn how to use the tools there to the best advantage for your own research. I have many posts on this blog for GEDmatch, . UPDATE 17 FEB 2019: Click here for the slides from my presentation about the basics of using this site from Saturday Feb 16, 2019, in Carlsbad for the North County DNA Interest Group (DIG).

To get started at GEDMATCH, you have to be registered as a user.  Your login will be your email address with a password you create. Some people prefer to use an email which they have created just for genealogical research. Easy to do at gmail, hotmail, or yahoo, among others and it is a way to create some privacy. Note that GEDmatch is careful to warn you when you register that their site can be used by law enforcement to try to identify violent offenders and victims. Click here to understand how your DNA can out a distant cousin who is a criminal.

Before you can use GEDMATCH to explore your test results, you have to download your DNA data from your testing company. Click here for the help page that GEDmatch provides on how to download your DNA. The file of your test results is quite large (about 700,000 lines of data) and zipped. DO NOT UNZIP it.

To upload your results to GEDMATCH you log in and then click on Generic Uploads (23andme, FTDNA, AncestryDNA, most others) in the right hand column under Upload your DNA files. That takes you to a form to fill out before doing the upload. You have to enter the name your kit was registered under, but you can choose to use a pseudonym to appear on GEDMATCH. Put it in the box for alias on this form. For example, all my cousins are called Kittys#CuzNN where the number sign is 1st, 2nd, or 3rd, and NN is their initials so that I know who they are! You have to change the No to a Yes after “You authorize this data to be made available for comparisons in the GEDmatch public database” if you want your results to be visible to your matches.  If you want to stay private, then leave it as is for now, but change it after it is uploaded to “Research” so you can use all the tools on the site but stay invisible. Once your or your cousin’s file is uploaded, you are assigned a kit id (2 letters plus several digits) which will also always show on your home page when you log in. You need a kit id to use the tools. You can upload multiple tests and manage them all from this one user.

You can make edits to any kit you own by clicking the pencil icon next to it on the left side of your home page. Click here for my presentation slide that shows you that edit screen and where to change the privacy to public or research or private.

It usually takes a day or two to fully process your kit so that you can run the most important tool: the one-to-many. That is the tool that lists your DNA relatives in the GEDmatch database. While you wait you can experiment with the ethnicity tools (called admix here) covered in my Gedmatch basics post and in detail in these slides (click here).

If some cousin, like me, asked you to upload and gave you their kit number, you can do a one to one compare with that kit before your kit is fully ready for the other tools. Click here for the slide that shows the form to make that comparison. There are slides following that one which have some examples. You can use all the defaults when you fill out the form with one exception: you may prefer to check the prevent hard breaks box at the bottom. That is particularly recommended for an X one to one. Personally I prefer to look at the image only comparison first, then I click back and select position only to get the numbers for each segment to put in my master spreadsheet.

Once you see a blue check mark on the line with your kit number on your home page (as in image above), you can run the one to many tool. That looks at all the other kits in the database to find people whose DNA matches yours. The more cMs you share, the closer the match.

Continue reading